Day out in Sheffield Park, East Sussex

Day out in Sheffield Park, East Sussex

So as we now have an active little toddler travelling with us, it’s important for us to ensure that where we go is a child friendly place. So this post has been written from that point of view, but hopefully you can enjoy it too even if you haven’t got a kiddo to entertain. 🙂
20200701_105129

Sheffield Park is situated in Uckfield, roughly between Crawley and Brighton in East Sussex. Its beautiful gardens amongst five lakes are landscaped beautifully and there are also loads of trails and meadows around the lake. All in all there is 300 acres to discover.

20200703_210653

What makes this place particularly special is that there is an array of interesting, huge, twisty, rare and old trees to marvel! Some of them are over 150 years old! It’s not surprising then that the gardens have received Grade 1 listing and definitely make this area unique and fun to discover.

20200701_104300

The trail is an easy walk and kid and stroller friendly. We actually left our stroller by the entrance so that’s an option too.

IMG-20200703-WA0014

20200701_123221

Sheffield Park is famous for having beautiful seasonal displays of nature. As it’s summer the water lilies were in season and one of the lakes is covered by them. They were just gorgeous and should be in bloom until September.

20200701_103349

20200701_110024

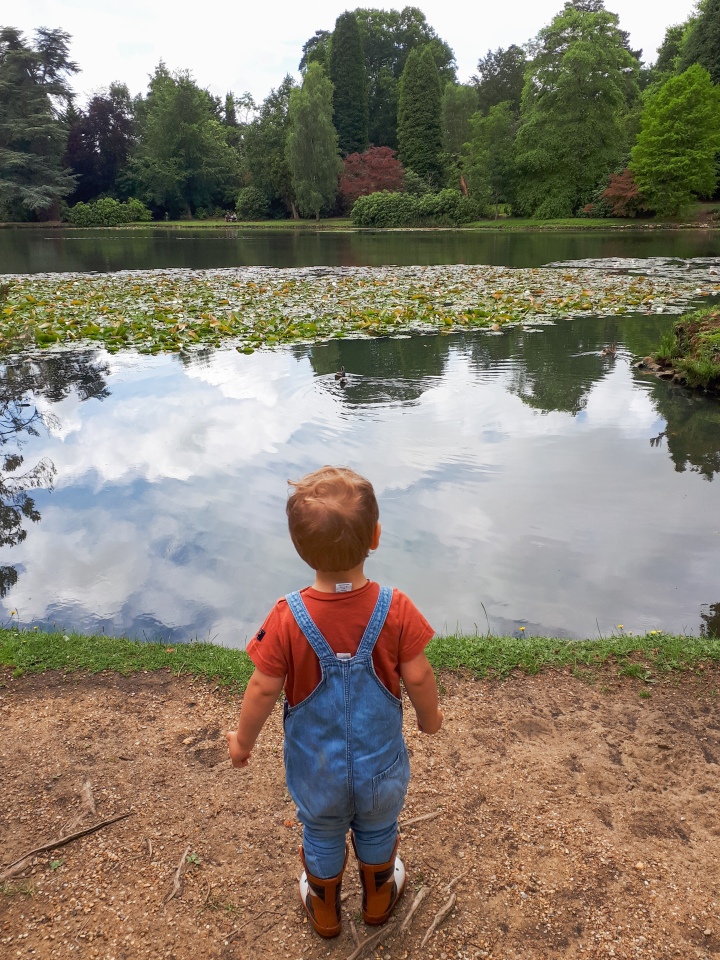
The lake is also a home to some extremely friendly ducks that are bound to spellbind any little ones.

20200701_105727

Along the way they had put on some lovely quotes from a book called A Breath of Fresh Air. They invited visitors to be more mindful and how nature can help with that. This one was my favourite. I think it resonated with me having had this weird spring with all its tumultuous changes.

20200701_114218

There are some lovely carved benches dotted along the trails to rest and admire the views and also many great spots to have picnics too. You can also find some picnic tables before the entrance overlooking the parkland across the road. We just had a little blanket on a quiet spot in a meadow.

20200701_114122

Speaking of the parkland across the road.. There are grassy fields (250 acres of it) you can wander around and see some sheep and cows grazing up close and personal. After a short walk you can also find a natural play area for children. Find a map by the entrance to the parkland and head towards Ringwood Toll over the little uphill and through two cattle gates. After the second gate there are posts to follow for a little while. You should see the gate to Ringwood Toll on your left.

parkland

The give away is that it’s a wooded area on the field. Overall the walk is little up and then downhill. Our toddler managed it well (just watch out for lots of animal poo, mostly dried thankfully) and pushing strollers requires little or some effort depending on your stroller. Once you arrive at Ringwood Toll it has a path going in a circle of the wooded area and my tip for you is to go anti clockwise. We went clockwise and our toddler was too tired to play (!!!) with the cooler stuff that was at the end of the walk.

20200701_152750

The natural play area is on the other side of the entrance, it is lovely shaded area where children can build dens, balance on a huge fallen tree and do seesawing among other things.

IMG-20200703-WA0028

It’s good for even older kids too. Be warned that there are no facilities. Also you don’t need to book to go there, it’s totally free.

IMG-20200703-WA0030

CORONA UPDATE – Your tickets for Sheffield Park need to be booked in advance. National Trust releases the following week’s tickets on each Friday morning. This also includes for members. There is a little cafe selling coffee, tea and refreshments in take away cups and by the entrance there is also a Jude’s ice cream stand. The toilets are open and in key areas there are reminders to keep 2m safety distance. It is easy to keep distance in Sheffield Park, there is lots of room and capacity is kept low. The lake can be toured one way only at this time, but makes no difference to enjoyment of it. Tickets cost £10 adults, £5 children for Sheffield Park for non-members and parking is free for all visitors. You can read more info about Sheffield Park and parkland here.

I will also be adding Sheffield Park autumn foliage display on my autumn bucket list. My husband went there a few years ago and it was lovely.

We timed our day to be there at 10am and walked around the lake and discovered the trees and meadows in the morning. We had a picnic lunch and whilst our son napped in his stroller we explored some more trails and stopped for a coffee. After his nap we headed to the parkland and natural play area where we stayed until about 4pm. That wrapped up our lovely day out in Sheffield Park. Totally recommended!

IMG-20200703-WA0006

Making a naked cake (the hard way!)

Making a naked cake (the hard way!)

I blinked and he was two years old.. The time has gone so quickly that my little baby I gave birth to yesterday is now two.. I love a good theme for parties and this year we went for a jungle theme. I had all these decorations and activities planned ages ago and of course corona came and pooped all over my plans, but we decided to plough on anyways even though his little friends were not able to  celebrate with us. We will for sure do a jungle party at some point once it’s all safe. I will be posting about the jungle decorations soon as well so if you are planning a jungle themed party then watch this space. So! Jungle theme needs a jungle cake!

I made a naked cake last year with a woodland theme and as it was so good I thought I’d follow the same steps and tweak the decoration on top. My plan was to colour the whipped cream green and create a little jungle on top. Spoiler alert – It didn’t quite go according to my plan, but I got there in the end. So this is a story how to do naked cake the hard way haha!

The cake base is this recipe from the domestic goddess herself Nigella Lawson. I do love her baking recipes. The cake comes out really moist and rich, lovely even on it’s own. I don’t do the fudge icing and I use whipped cream and stack my cake bases to create naked cake style. Her recipe is simple, you just need three bowls and ability to mix!

Ingredients

Cake base

  • 400g self raising flour
  • 250g caster sugar
  • 100g light brown sugar
  • 50g cocoa powder
  • ½ ts salt
  • 3 large eggs
  • 142ml sour cream
  • 1 tbsp vanilla extract
  • 175g unsalted butter (melted and cooled)
  • 125ml corn oil
  • 300ml cool water

Topping

  • Whipping or double cream
  • 1 tbsp vanilla extract
  • 1 banana
  • Few drops of green food colouring 
  • Candles, I used these
  • 1 giraffe calf with a party hat (I love Schleich animals and party hat was made with gold vinyl I had on hand)

20200609_0912361924666955600707979.jpg

Switch your oven on to 180°C/ 160°C Fan/ gas mark 4/350ºF and grease your cake tin. This recipe will give you either two 16 cm/6 inch cakes or one 21 cm/8 inch, so if making a big cake like my woodlands one below in the post then you need to double the recipe.

Firstly mix all the dry ingredients together. Nigella uses plain flour, baking powder and bicarbonate of soda, but I actually substituted all that with self raising. I sieved cocoa, but rest I just chucked in and gave it a good stir.

20200608_1344044527058823038812871.jpg

In a second bowl mix eggs and sour cream until combined.

20200608_134854612298510792655134.jpg

And finally in a third bowl mix corn oil and melted and cooled butter. Then chuck the oil/butter mix into the dry ingredients and stir until all combined. Then add the last bowl of eggs and sour cream and mix it all together. I used electric whisk, but you can do by hand too.

20200608_1358073881151992255011134.jpg

Then pour into a greased tin and bake in the oven for 50-55mins. I only had one little tin so I poured half of my mixture and baked it.

20200608_1532299185449628136424690.jpg

You can see if your cake is ready by putting a skewer in and if it comes out clean then it’s ready. Let it cool in its tin on a wire rack for 10-15 mins and then tip it out to cool completely on the rack. I washed and greased my little cake tin again and then baked the second layer. Once both cakes had cooled completely I used a big knife to cut out uneven bits off and then stacked them on top of each other to ensure I wasn’t going to end up with a leaning tower of Pisa of a cake. Don’t worry if the top doesn’t look smooth, it will be covered. 

20200608_1913498850086027160658717.jpg

I actually baked my cake bases the day before so I put them on a plate and cling film over them and they were absolutely fine the next day. 

I thought I would put mashed banana and whipped cream in between the layers. To get the naked cake effect you just dollop a lot of whipping cream in between the layers, so much so that when you squish the top layer down a bit, it oozes out on to the sides. Then using a spatula smash the cream against the cake sides and work your way around the cake. Use the spatula to scoop some more whipped cream and smush it on to the side.

So if you remember I wanted my cream to be green so once I had whipped my cream I separated a little bit to add green colourant. Now here is the mistake.. I put waaay too much of it in.. “Ooooh, I’m sure it’ll look ok on the cake” I thought to myself as I started to spread it..

20200609_09254771666241598981207.jpg

No. No. No. Noooooo…. It was not looking good.. Our video call with grandparents was due to start in ten minutes and I started to have sweaty pits and now a toddler running around in my ankles.. I finished it, but it looked absolutely terrible! It looked like it was a love child between Halloween and St Patrick’s and not at all what I wanted! Womp womp..

As I stood there and thought how this hideousness would be photographed and forever recorded in my memories I thought “no way, not in my name!” and decided to scrape it all off! Of course not all of it came off and time was ticking on, so stubbornly I carried on.. I then put white whipped cream (luckily I had separated the bowls and had some ready whipped!) and worked it around the cake again with a spatula.

By this point my nerves were in shreds and I didn’t think I could pull it back – so no pics. BUT! the white cream mixed with bits of the horrible green cream mixed with scraped brown cake it started to look a bit more earthy and pastel-ly? Okay okay.. maybe I got this? I kept going, aware of the time, aware of my toddler now asking for cake repeatedly in increasing intervals, aware of the mess I had made in the kitchen and mostly aware how this green colouring had coloured my fingers up to my knuckles! Once the cake was covered with my weird mixture of whipped cream, tiny bit of green colouring and some cake that had lifted off it looked.. minty..?

I sighed a relief and started to work on the top of the cake. So first choose which bit is the best lookin’ one and determine it to be the front. Then I put on my little giraffe calf in the middle with his party hat on and then the candles slightly angled. Finally I topped it off with mint sprigs. I created a little height behind the candles to balance the giraffe and then surrounded the giraffe on the cake perimeter. I also had added a few leaves on the bottom to create a little interest there too.  

So if you want to achieve this look then either do what I did (and put good deodorant on) OR use your colouring sparingly!

For reference, this was way too much

20200609_0909107214329382413529154.jpg

All in all very happy how it turned out after my mini drama in the kitchen haha! And it tasted divine too! Toddler of course would have eaten it regardless, this one was for mama. 

cake

If you want to do woodland theme then this is my cake last year for his first birthday. It’s made with 21cm / 8 inch cake tin with two layers as we actually had guests too.

Woodland naked cake

I put whipped cream all the way to the top of the cake on this one and then sieved cocoa powder on top of the white whipped cream to create a darker base to avoid it looking snowy in June.. For animals I had a mama deer and baby deer on top and fox at the base. I arranged the deer on top first and used mint as well to create a little greenery. I tried it with rosemary for a little practise cake and uhm… you could totally taste it if you got that piece, so stick with herbs you like the taste of and go with cake!

I also made a little banner for it using bamboo skewers and a bit of linen fabric that I cut to diamond shape and then glued together with a string running through it. I then used a permanent marker to make the letters once the glue was dry and strung it between the bamboo skewers.

In between layers I used raspberry jam instead of mashed banana and it was really delicious too! Actually I preferred the taste on the woodland cake, but then I really like chocolate-raspberry combo. Even my wedding cake was that flavour. And no, I didn’t bake that one. My mother in law did 😀

This cake and how you decorate it is so versatile! It’s the perfect base for a naked cake even for a novice baker like me. Just take it easy with food colouring if using.. I’m going to stick to white cream from now on!

If you end up giving this a go,  I would love to see what you create! Please send a photo or tag me on Instagram!


Liquorice-chocolate cheesecake

Liquorice-chocolate cheesecake

First thing to say about this cake is that it’s sin on a plate. There is nothing healthy about this cake. But as it’s so rich you only need a little. That balances it right?? 😀

Continue reading “Liquorice-chocolate cheesecake”

Making very easy ‘no sew’ bunny ears

Making very easy ‘no sew’ bunny ears

It’s the first Easter with our baby and I wanted to mark the occasion and make some super simple bunny ears. This is a 15 minute project and requires no skill, and the results are worth it. Sign me up for adding little ears on little ones!

Continue reading “Making very easy ‘no sew’ bunny ears”

Gdansk

Gdansk

I have these vintage maps at home where I add a pin for every place we visit. It was looking really sparse in Eastern Europe so in an effort to change that and also make our money go further having had to pay couple of grand to fix a water leak and damage made by it, we grabbed some cheap flights to Gdansk, Poland.

Continue reading “Gdansk”

Making a DIY Halloween costume for baby

Making a DIY Halloween costume for baby

It’s my baby’s first Halloween! Whilst being under 5 months at Halloween he has no idea what’s happening, mama could not be more excited! So the occasion requires correct attire, no? In an effort not to go too crazy I fashioned this super simple costume that took about an hour to make and cost around £4!

Continue reading “Making a DIY Halloween costume for baby”

Photography inspiration

Photography inspiration

Okay so this post is a little random and doesn’t really fit with any of the usual categories here, but I had the inspiration for inspiration and wanted to share it! And a new category was born here – “Random” 😀

I enjoy taking photos and as with anything the more you do it the better and quicker you become. I find that sometimes it can be hard to find practise inspiration when you are taking photos “just because”. It can make you feel a bit silly and like you are doing something without a purpose. Never a good feeling right?

I thought I’d collect a few things/places that I have stumbled across that have given me a lot of inspiration, maybe they will help you too?

Continue reading “Photography inspiration”

Making a cactus mobile for baby

Making a cactus mobile for baby

It has been very quiet here on the blog side of houseofharlow, but I can assure you our actual House of Harlow has been very busy indeed! We are growing this household and been preparing for a baby! Our bundle of joy is expected to make an entrance anytime now and we have spent the last several months getting ready. I have some projects and things coming up about that preparation process once I get a chance to write them up and photograph things so watch this space.. Speed of that will depend on when lil ‘un decides to make an entrance! 😀

Here is the first one – kicking off with something easy and simple!

Continue reading “Making a cactus mobile for baby”

Hong Kong and Macau

Hong Kong and Macau

We always thought we’d visit Hong Kong on a stopover to somewhere else and spend couple of days there. But the more we looked into Hong Kong as a destination, it became clear to us that this city was no stopover place. Hong Kong has so much to see and do that it totally deserves a trip of its own!

Continue reading “Hong Kong and Macau”

DIY budget friendly Halloween decorations

DIY budget friendly Halloween decorations

Here in UK Halloween is not that big of a holiday in the sense it is in the US, though it seems to gain popularity each year. I really want to embrace this silly event as there is really not much going on in the autumn side of the year otherwise. It’s perfect to break up the end-of-summer-but-not-yet-Christmas vibe.

Continue reading “DIY budget friendly Halloween decorations”

Making a DIY live edge coffee table

Making a DIY live edge coffee table

Ok, confession time. We have lived in our flat for 7 years (whaaa – where does the time go?!) and never had a coffee table. Why not? Dunno, never found something we liked. I then finally wanted one and really like the live edge look. We know this timber place  in Surrey and was hoping they would have some cross cut pieces.

I love going there – It’s like a fantastical warehouse in the middle of country side full of unusual and exotic woods in all shapes and sizes. And lo and behold they had a full stack of cross cuts of yew tree in perfect size! £100? You good sir have yourself a steal deal.

Continue reading “Making a DIY live edge coffee table”

Making a monogrammed purse

Making a monogrammed purse

I wanted to make a purse as a little birthday present for a friend. I like giving personalised gifts, so I thought of doing a monogram on the purse with split stitch. It’s really easy to do and once you learn it you’ll want to monogram and embroider everything!

Continue reading “Making a monogrammed purse”

Making a simple waffle fabric towel

Making a simple waffle fabric towel

Pretty much every kid in Finland makes waffle fabric embroidery at some point at school. I remember loving this simple and effective project, where your imagination is the only limit for the pattern.

Whilst on holiday in Finland last week I was browsing in a fabric store (as you do on your holiday – doesn’t everyone?! Ha!) I saw some in a roll, felt nostalgic and picked some up to make couple of tea towels. If you fancy an easy project then look into this one. They are so simple to do – even a kid can make one! 🙂

Continue reading “Making a simple waffle fabric towel”

13 Tips for renting a car abroad

13 Tips for renting a car abroad

Many years ago me and Mr Harlow discovered the joy of rented wheels whilst on holiday. What hooked us is the sense of freedom you get, when you can point the car to any direction at any time and just go. Over the years we have learned a few things about renting a car abroad and thought to pass these 13 tips to you. Here’s the punchline – to get that sense of freedom, it’s good to have done your homework first!

Continue reading “13 Tips for renting a car abroad”

Making vintage pin maps

Making vintage pin maps

I’m a great believer in having little mementos and photos around the home to remind you of places you’ve been, things you have done and people you were with. Experiences are the salt of life right? We love travelling and I wanted to have a map to pin all our trips together. I also hoard little mementos like tickets and receipts from these trips and wanted to find a way of displaying them to remind us of all the awesome times we have had. I wanted to do some real life pinning! Continue reading “Making vintage pin maps”

Painting an ombre wall

Painting an ombre wall

Our main bedroom is fairly small and I had grown tired of the busyish pattern we had on a wall paper. I also became convinced it was making the room look smaller. I considered a different wall paper, painting the whole bedroom just white or another colour, but nothing seemed right..

Then I stumbled across in Pinterest to a picture of an ombre wall and BAM! That was it. My next few weeks were occupied thinking which colours to choose, researching the technique and convincing Mr Harlow on this important obsession mission of course. I mean we had to remove the wall paper first and he naturally needed to help me with the painting process..

Continue reading “Painting an ombre wall”

Making mounts for frames

Making mounts for frames

It’s so nice to display photos and art in frames around your home, it really makes the space so much more personalised! I also like the finished look a good mount gives, but getting it done professionally can be a bit pricey. Especially for a gal like me who likes to switch things up on regular basis.. In fact we got it done for half the price for this project.

Before Mr Harlow came along I used do a quick ‘n’ dirty job of just cutting thick card with scissors, but as Mr Harlow has learnt the skill of mounting I have gotten a nice upgrade on displaying photos, prints and his original artwork. I asked if he could share his secrets so you can upgrade yours too with a little time and investment.

Continue reading “Making mounts for frames”

Liquorice Muffins

Liquorice Muffins

So this is where my Scandi roots really show.. Liquorice is having a major moment in my native Finland with famous chefs creating exciting new flavours and production being more artisan and small scale.

I have been brought up to love all things liquorice and we even take a step further to add salt to it to make something called “salmiakki”. Generally when I introduce any of my English friends to the salty variety it doesn’t seem to impress them.. I guess you have to get the taste for it from young age! These muffins however are not salty, but chocolatey and sweet with a hint of liquorice that you can add to your taste. Continue reading “Liquorice Muffins”

Italian Lakes

Italian Lakes

This trip was one of our specialties “Let’s book something week before we fly”. Italian lakes have been on the ol’ shortlist many times, but as they are so accessible (lots and lots of cheap flights with less than 2hr flight time) we always kept saving them for a rainy day when we can’t find a good deal. So week before flying and at the start of the school holidays we cashed in our saved trip. Good news is that it’s so heart achingly beautiful I would go to this area many more times over especially as there is so much to see and do so it’s still actually in the bank!

Continue reading “Italian Lakes”